初始化
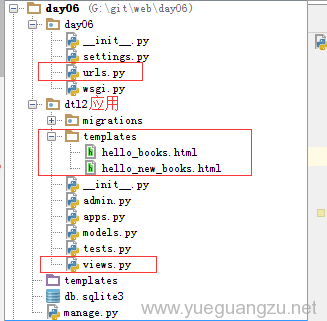
项目对应目录结构:
#views.py
# -*- coding: utf-8 -*-
from __future__ import unicode_literals
from django.shortcuts import render,HttpResponse
def hello_book(request,bn):
    return render(request,'hello_books.html',{'books_name':bn})
def hello_new_books(request,bn):
    return render(request,'hello_new_books.html',{'books_name':bn})
#urls.py
#-*- coding:utf-8 -*-
from django.conf.urls import url
from django.contrib import admin
from dtl2 import views
urlpatterns = [
    url(r'^books/([\S\s]+)/$', views.hello_book,name='books_url'),
    url(r'^new_books/([\S\s]+)/$', views.hello_new_books,name='new_books_url'),
]
DTL
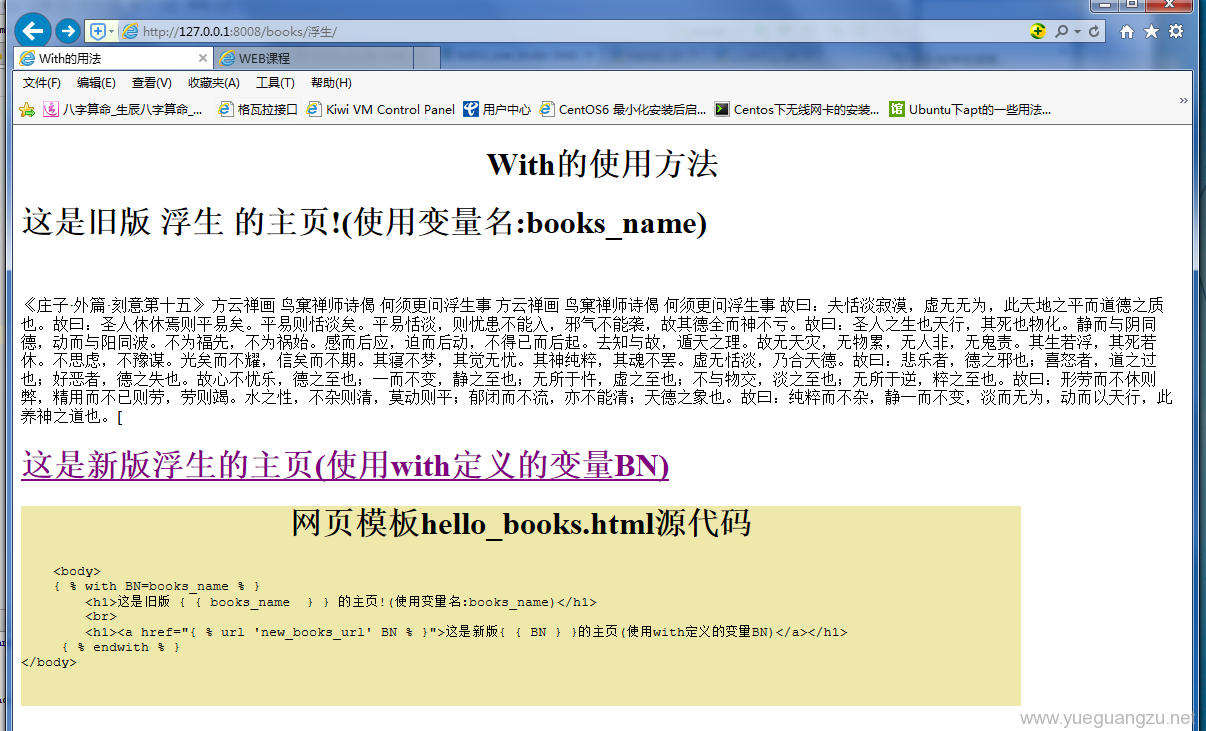
1.with
缓存一个变量,为变量起个别名,缓存的变量作用范围: 直到遇到{%endwith%}结束
{% with BN=books_name %}…….{%endwith%}
1.1本例子将books_name在with的范围内,用BN替代
#hello_books.html
<!DOCTYPE html>
<html lang="en">
<head>
<meta charset="UTF-8">
<title>With的用法</title>
<style>
.box{
width: 1000px;
height: 200px;
background: palegoldenrod;
}
</style>
</head>
<body>
<center><h1>With的使用方法</h1></center>
{% with BN=books_name %}
<h1>这是旧版 {{ books_name }} 的主页!(使用变量名:books_name)</h1>
<br>
<h1><a href="{% url 'new_books_url' BN %}">这是新版{{ BN }}的主页(使用with定义的变量BN)</a></h1>
{% endwith %}
<div class="box">
<center><h1>网页模板hello_books.html源代码</h1></center>
<pre>
<body>
{ % with BN=books_name % }
<h1>这是旧版 { { books_name } } 的主页!(使用变量名:books_name)</h1>
<br>
<h1><a href="{ % url 'new_books_url' BN % }">这是新版{ { BN } }的主页(使用with定义的变量BN)</a></h1>
{ % endwith % }
</body>
</pre>
</div>
</body>
</html>
演示效果
2.auto_escape
开启和关闭自动转义
{%autoescape off%}=={%变量名|safe%}
3.Request
从后台传过来的request对象中获取某种信息
#hello_books.html
<html lang="en">
<head>
<meta charset="UTF-8">
<title>request的用法</title>
<style>
.box{
width: 1000px;
height: 400px;
margin: 200px auto;
background: skyblue;
}
</style>
</head>
<div class="box">
<body>
<center><h1>request的用法</h1></center>
<h1>request.path: {{ request.path }}</h1>
<br>
<h1>request.user: {{ request.user }}</h1>
<br>
<h1>request.GET.urlencode: {{ request.GET.urlencode }}</h1>
<br>
<h1>request.dasfasdf: {{ request.dasfasdf }}</h1>
<br>
</div>

4.过滤器 var|opt
对变量进行过滤处理。在真正渲染出来之前,过滤器会根据指定操作处理好变量,然后把得出结果替换掉原来的变量。
注意事项:
(1)变量和过滤器中间使用管道符号”|”进行使用。
(2)可以通过管道符号进行链式调用,比如实现一个功能,先把所有字符变成小写,把第一个字符转换成大写,代码如下:
(3)过滤器可以使用参数,在过滤器名称后面使用冒号”:”再加上参数,比如要把一个字符串中所有的空格去掉,则可以使用cut过滤器:
注意:使用参数的时候,冒号和参数之间不能有任何空格,一定要紧挨着。
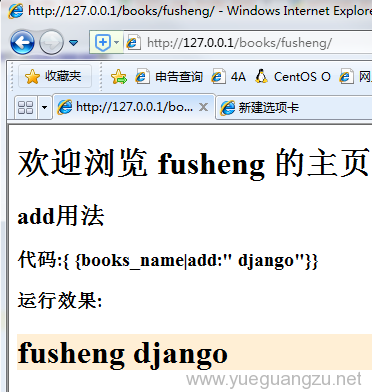
4.1、 add :字符串相加,数字相加,列表相加,如果失败,将会返回一个空字符串。
{{books_name|add:" 需要拼接的内容"}}
#hello_books.html
<h2>add用法</h2>
<h3>代码:{ {books_name|add:" django"}}
</h3>
<h3>运行效果:</h3>
<div>
    <h1>
{{books_name|add:" django"}}
    </h1>
</div>
4.2、default:提供一个默认值,在这个值被django认为是False的时候使用。比如:空字符串、None。区别于default_if_none,这个只有在变量为None的时候才使用默认值。
{{books_name|default:"默认的内容"}}
<h2>default用法</h2>
<h3>代码:{ {books_name|default:"因为url没有传书名,所以我这里就默认是这段废话了"}}
</h3>
<h3>运行效果:</h3>
<div style="background: papayawhip;">
<h1>
{{books_name|default:"因为url没有传书名,所以我这里就默认是这段废话了"}}
</h1>
</div>

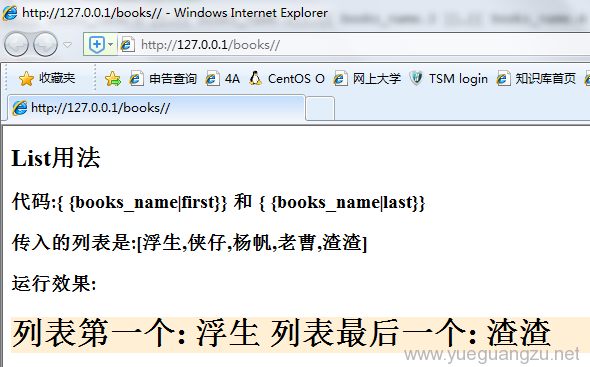
4.3、first 返回列表中的第一个值
last 返回列表中的最后一个值。
###views.py
# -*- coding: utf-8 -*-
from django.shortcuts import render
def hello_books(request, bn):
        bn=['浮生','侠仔','杨帆','老曹','渣渣']
        return render(request,'hello_books.html',{"books_name":bn})
#hello_books.html
<h2>List用法</h2>
<h3>代码:{ {books_name|first}} 和 { {books_name|last}}</h3>
<h3>传入的列表是:[{{ books_name.0 }},{{ books_name.1 }},{{ books_name.2}},{{ books_name.3 }},{{ books_name.4 }}]</h3>
<h3>运行效果:</h3>
<div style="background: papayawhip;">
    <h1>列表第一个:
       {{ books_name|first }}
        列表最后一个:
       {{ books_name|last }}
    </h1>
</div>
4.4、date 格式化日期和时间
time 格式化时间
###views.py修改后台,传入一个时间/日期
# -*- coding: utf-8 -*-
from __future__ import unicode_literals
from django.shortcuts import render
import datetime
def hello_books(request, bn):
        bn=datetime.datetime.now()
        return render(request,'hello_books.html',{"books_name":bn})
#hello_books.html相应的改动前端
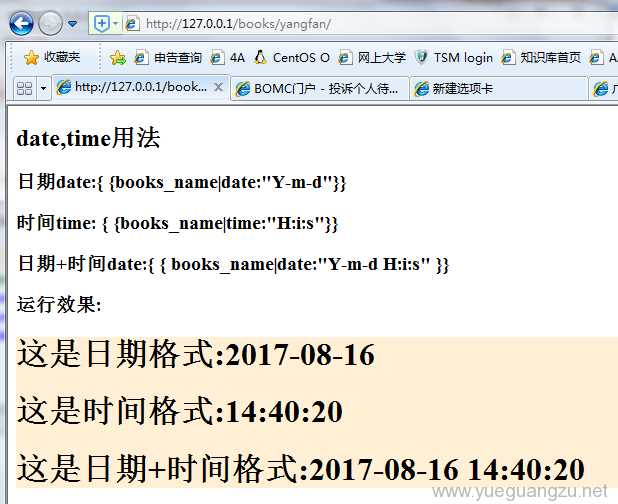
<h2>date,time用法</h2>
<h3>日期date:{ {books_name|date:"Y-m-d"}} </h3>
<h3>时间time: { {books_name|time:"H:i:s"}}</h3>
<h3>日期+时间date:{ { books_name|date:"Y-m-d H:i:s" }}</h3>
<h3>运行效果:</h3>
<div style="background: papayawhip;">
<h1>这是日期格式:{{ books_name|date:"Y-m-d" }} </h1>
<h1> 这是时间格式:{{ books_name|time:"H:i:s" }} </h1>
<h1>这是日期+时间格式:{{ books_name|date:"Y-m-d H:i:s" }} </h1>
</div>
4.5、join 跟python中的join一样的用法。
length 返回字符串或者是数组的长度。
# -*- coding: utf-8 -*-
from __future__ import unicode_literals
def hello_books(request, bn):
        bn='其生若浮,其死若休!'
        return render(request,'hello_books.html',{"books_name":bn})
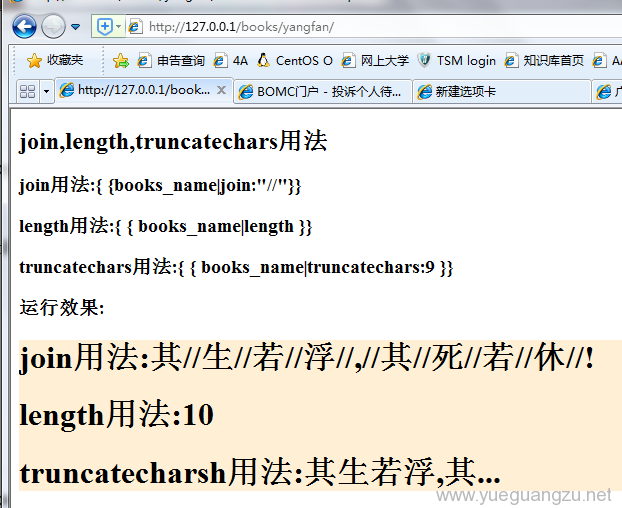
<h2>join,length,truncatechars用法</h2>
<h3>join用法:{ {books_name|join:"//"}} </h3>
<h3>length用法:{ { books_name|length }}</h3>
<h3>truncatechars用法:{ { books_name|truncatechars:9 }}</h3>
<h3>运行效果:</h3>
<div style="background: papayawhip;">
<h1>join用法:{{books_name|join:"//"}} </h1>
<h1>length用法:{{ books_name|length}} </h1>
<h1>truncatecharsh用法:{{ books_name|truncatechars:9 }} </h1>
</div>
5.Template 继承与引用
继承:
模板继承使用extends标签实现。通过使用block来给子模板开放接口。
1、extends必须是模板中的第一个出现的标签。
2、子模板中的所有内容,必须出现在父模板定义好的block中,否则django将不会渲染。
3、如果出现重复代码,就应该考虑使用模板。
4、尽可能多的定义block,方便子模板实现更细的需求。
5、如果在某个block中,要使用父模板的内容,使用block.super获取。
格式
{%extends ‘base.html’%}
{%block title%}xxx{%endblock%}
{%block content %}
xxx
{%endblock%}
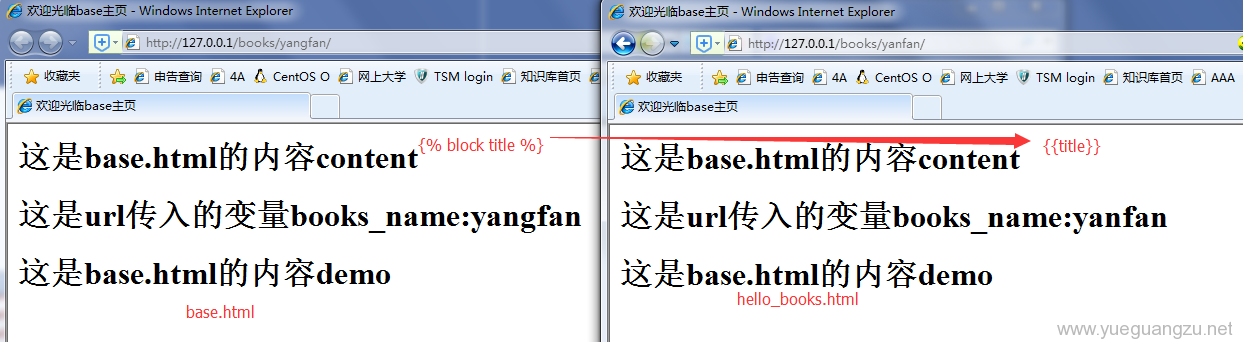
5.1首先先准备一个base.html,作为父辈页,里面定义3个block变量:title,content和demo,这三个变量将作为最原始的变量
#base.html
<html>
<head>
<title>{% block title %}欢迎光临base主页{% endblock %}</title>
</head>
<body>
<h1>
{% block content %}
这是base.html的内容content
{% endblock %}
</h1>
 <h1>{{ books_name }}</h1>
<h1>
{% block demo %}
这是base.html的内容demo
</h1>
{% endblock %}
</body>
</html>
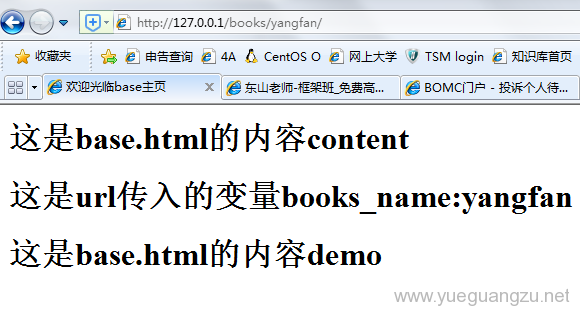
5.2然后定义一个子辈的页面hello_books.html的子页面,最上面必须先使用
{% extends "base.html" %}
引用父辈页面的变量title ,content 和demo
#views.py
# -*- coding: utf-8 -*-
from django.shortcuts import render
def hello_books(request, bn):
        return render(request,'hello_books.html',{"books_name":bn})
#hello_books.html
{% extends "base.html" %}
<html>
<head>
{{ title }}
</head>
<body>
{{ content }}
{{ demo }}
</body>
</html>
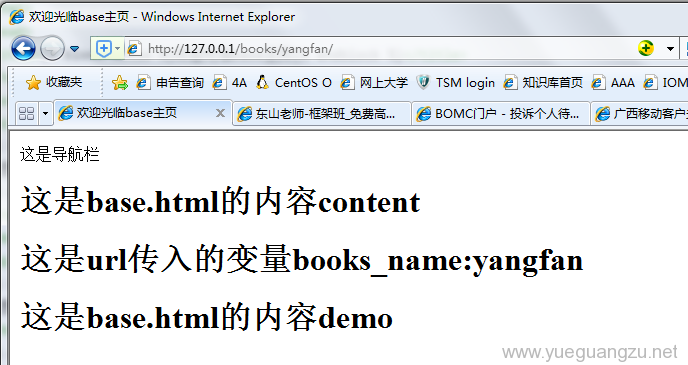
5.3这样我们http://127.0.0.1/books/yangfan/访问子页面hello_books.html 时,直接访问title 这个变量,就继承base.html 定义的变量title
6.引用:
include 标签可以包含一个html模板到当前模板中。和继承不同,include是把html模板在此处展开。
{% include 'nav.html'%}
6.1定义一个导航页面nav.html
#nav.html
<html>
 <head>
 这是导航栏
 </head>
  <body>
    <br>
  </body>
</html>
6.2放{% include 'nav.html' %}到父类模板base.html的开头
#base.html
{% include 'nav.html' %}
<html>
<head>
<title>{% block title %}欢迎光临base主页{% endblock %}</title>
</head>
<body>
<h1>
{% block content %}
这是base.html的内容content
{% endblock %}
</h1>
 <h1>{{ books_name }}</h1>
<h1>
{% block demo %}
这是base.html的内容demo
</h1>
{% endblock %}
</body>
</html>
作业:
1,“this is a pig” , 单词逆序-》 "pig a is this";
2, 在整型数组里找到单独的数,其他数都是配对的;
3,浏览器输入 :http://127.0.0.1:8000/add/10/20
    页面返回结果:30
4,浏览器输入 :http://127.0.0.1:8000/add/?a=10&b=20
    页面返回结果:30
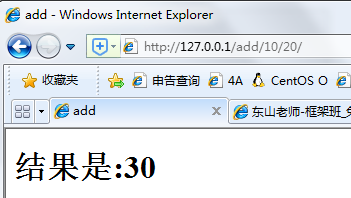
3.浏览器输入 :http://127.0.0.1:8000/add/10/20
要求页面返回结果:30
#views.py
def add(request,bn1,bn2):
    return render(request,'add.html',{'a':bn1,'b':bn2})
#add.html
<body>
    <h1>结果是:{{a|add:b}}</h1>
</body>
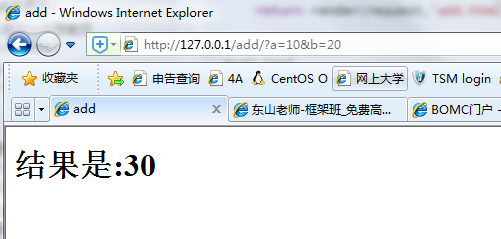
4.浏览器输入 :http://127.0.0.1:8000/add/?a=10&b=20
页面返回结果:30
#views.py
def add(request):
    a=request.GET.get('a')
    b=request.GET.get('b')
    return render(request,'add.html',{'a':a,'b':b})
#add.html
<body>
    <h1>结果是:{{a|add:b}}</h1>
</body>


最新评论